Attack Detection Fundamentals 2021: Azure - Lab #1
By Masande Mtintsilana on 28 April, 2021
In the final part of WithSecure Consulting's Attack Detection Fundamentals workshop series for 2021, we covered a walkthrough of an end-to-end kill chain in Azure.
Beginning with compromising a user account to retrieve service principal credentials, escalating privileges by further credential discovery, and finally moving laterally to a VM in order to access sensitive information.
A recording of the workshop can be found here, and the slides here.
In this lab, we will cover the use of consent phishing to gain access to a victim user's email inbox. As Azure AD handles user consents, we will then take a look at the log events generated.
Note: Though Azure AD log events are often quick to be generated, it may take several minutes for the log events to reach your configured Log Analytics Workspace.
Required Tools
- An Azure Subscription suitable for testing purposes;
- Terraform;
- Azure CLI;
- O365 Attack Toolkit;
- Caddy.
Optional
- E1, E3 or E5 license (30 day trial licenses are suitable)
Walkthrough
Lab Environment
In this lab, we will need several cloud resources to be deployed in order to allow us carry out all offensive and defensive scenarios. Just as in our AWS workshop, to achieve this we'll be using Terraform. Terraform is a popular tool for developing Infrastructure-as-Code and provides us with a means to define, spin up, and teardown environments with ease.
To allow you to follow along with this lab, we've provided a test environment written with Terraform here. As discussed in the workshop, the primary components of the environment can be seen below.
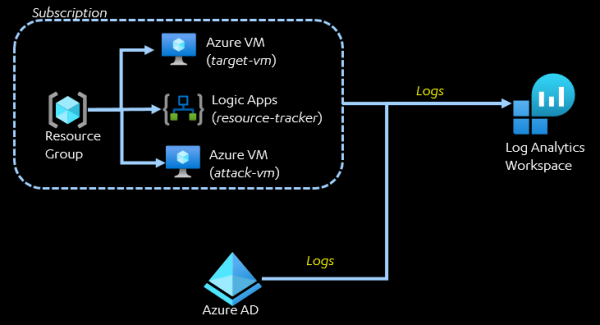
Our Azure environment will be hosted in a single Azure subscription, which will contain the following resources:
- Logic Apps;
- 2 x Azure VMs.
The dummy Logic App resource does not perform anything interesting, however it will serve its purpose of demonstrating how poor secret management can exploited.
The "target-vm" represents a 'highly monitored' VM containing sensitive information and the "attack-vm" will be used to remotely access the target VM.
The Activity Logs of the subscription will be configured to be sent to a Log Analytics Workspace. In addition, all Azure AD log types will be sent to the same Workspace.
Lab Deployment
The lab deployment was tested on a Ubuntu 20.04 machine. Ensure that you have authenticated to Azure and have set the current Azure subscription appropriately. As mentioned, this should be set to one that is suitable for testing purposes.
With Terraform installed (tested with 15.0), clone this project locally, and deploy your environment running the following command:
terraform init
terraform apply -var="<tenant name>"
Note: Deployment region and resource prefix can be controlled with variables "location=" and "prefix=", respectively.
After successful deployment, Terraform should output the following information:
- Victim user's Azure AD username and password;
- Attack VM IP, username and password;
- Reader service principal credentials;
- Contributor service principal credentials.
Using the following command, we can output this information.
terraform output -jsonNote: VM IP address may at times not reflect in Terraform output. In this case, the IP address can be retrieved in the Azure portal.
Setting up logging will be performed manually using the steps below:
- Create a log analytics workspace;
- Send Subscription Activity Logs to Log Analytics Workspace;
- Send AAD Logs to Log Analytics workspace.
Optional Mailbox Setup
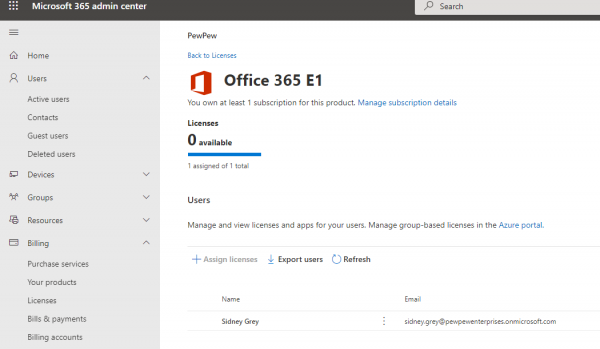
As an optional setup, we can assign our victim a license to activate an Exchange Online mailbox. In the Microsoft 365 Admin Center, under "Billing" -> "Licenses" assign the victim user a license.
Once this has been configured, we can send the victim an email containing plain-text credentials as seen below:
## Do not share with anyone
$clientid = "<reader service principal name>"
$secret - "<reader service principal secret>"
This is not essential, as we will still be able to complete the labs without it, but offers more realistic demonstration.
O365 Attack Toolkit Setup
After installing the O365 attack toolkit, we also need to configure it. The toolkit requires the use of an Azure AD registered application. However, As of 8th November 2020 Microsoft require you to be a "verified publisher" if you want to create multi-tenant applications. A workaround to this is to use an existing unused application that has been created before this date.
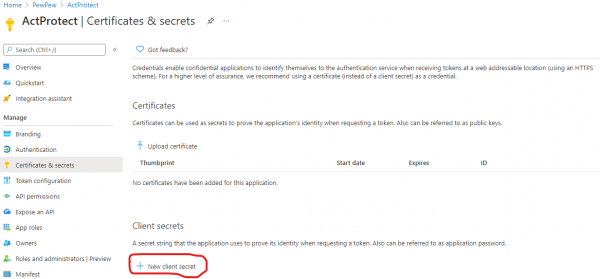
Create a set of credentials for this Azure AD application in the portal, by going to Azure Active Directory -> App Registrations -> (select Azure AD Application).
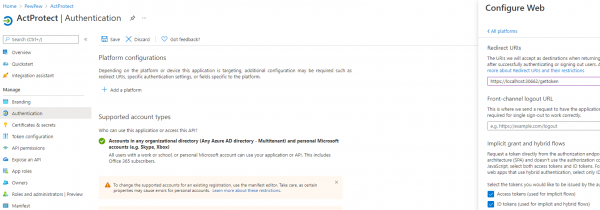
While still under "App Registration" we will then need to configure the application as a "multi-tenant" application, and supply a redirect URL. This is the redirect URL of where you will be running the attack toolkit. If the attack toolkit will be accessible on localhost, use the URL "http://localhost/gettoken", otherwise use "https://<ip address>/gettoken"
With the Azure AD Application configured, we can now populate the configuration file template.conf for the toolkit. Use the client ID, secret, and redirect URL that was used above.

The toolkit can then be started using ./o365-attack-toolkit

Note that the IP and port for the "internal server" will host the management interface, and the "external server" will host the external redirector.
As Microsoft requires Redirect URLs to use HTTPS if the hostname is not "localhost", for demonstration purposes we can setup a HTTPS reverse proxy for the non-localhost case. This can be done simply using Caddy, with the following Caddyfile configuration.
<IP address>
reverse_proxy 127.0.0.1:30662
The IP address represents a network accessible address from your victim's machine. Caddy can be started with
sudo caddy runConsent Phishing
Hopefully you now have the lab setup complete! So let's start the o365 attack toolkit.

With the toolkit up and running, we can visit the management interface to generate the link to send to our victim.
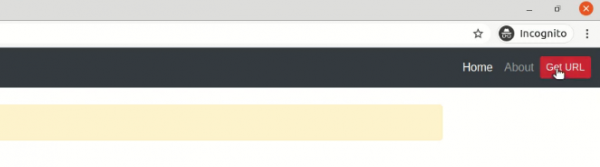
Optional Setup
As an optional step, we can craft an email which includes our link that will be sent to the victim.
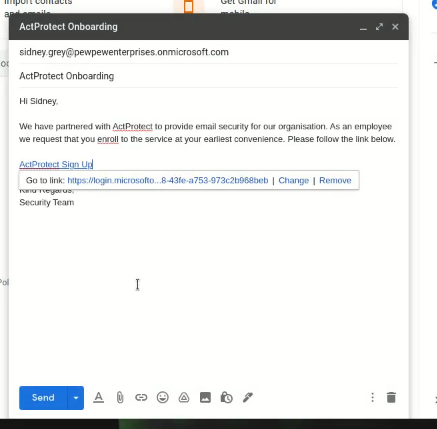
In the target user's inbox, we will receive the email. While logged in at https://portal.azure.com as our victim user, clicking on the link generated by the toolkit will take us to the Azure AD consent screen, as shown below.

Selecting "Accept" will grant our application permission to access everything the user has access to, be it SharePoint, OneDrive, or Exchange Online.
If you have followed the optional steps above, we can use the toolkit to search through the user's mailbox for strings that may indicate credentials (e.g. "secret", "password"). Otherwise we will directly use the Reader role service principal, which is part of the terraform output, in the upcoming Lab 2.
Detection
All the activities performed during our consent phishing attack results in changes in Azure AD, and as such, we can explore the Azure AD logs to better understand what log information these activities generated.
In the Azure portal, search for "Log Analytics Workspace" ans select the workspace directed. Navigate to the Query screen by going to "General" -> "Logs", and within the Query window use the search query below:
AuditLogs
| where parse_json(tostring(InitiatedBy.user)).userPrincipalName == "<UPN of user>"
This will return Azure AD Audit logs shown below.
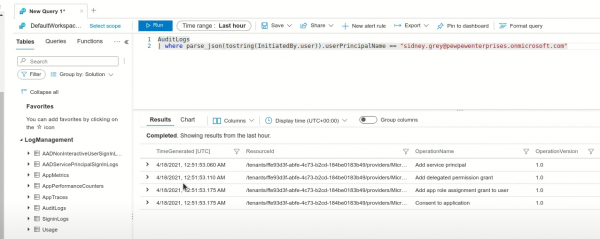
In the screenshot above, we can see the changes made in Azure AD by our user "Sidney Grey" during the consent phish. Four main events are generated:
- Add Service Principal - O365 toolkit Service Principal is added to the victim's tenant;
- Delegate Permission Grant - Application is assigned permission to access Exchange, SharePoint, etc;
- Add App Role Assignment - User is assigned role defined by the application;
- Consent to Application - Event indicating a user has consented to an application.
Drilling down to the second event "Delegate Permission Grant", we can see the specific permissions delegated to the toolkit by the user. These include:
- Mail.Read - Provides permissions to read emails on user's behalf;
- Mail.Send - Provides permissions to send emails on user's behalf;
- File.ReadWrite - Provides permission to read and write files that our user can access (e.g. SharePoint);
- offline_access - Toolkit can access resources for an extended period of time.
As these are considered sensitive, logs indicating the granting of these permissions can provide useful insights into potential threats within your environment.
Conclusion
In this lab, we have looked at setting up our environment and then using consent phishing to get delegated access to our victim's mailbox and other M365 services. This provided us with permissions to search for credentials and other sensitive information.
We then took a look at our Log Analytics Workspace to understand the log events generated in Azure AD and highlighted some useful permissions to keep an eye on, as they offer privileged access to organisational data.
In the next lab, we will use a set of 'discovered' credentials to further escalate our privileges, broadening our reach in the Azure environment.